There has been a lot of buzz in the Ruby on Rails community in recent years, and much of it is due to a shift in front-end strategy. While many server-side frameworks embraced React, Vue, Backbone, Svelte, and others, the Rails team stuck with jQuery. They did eventually come around to a solution with Webpacker that sought to bring Rails into the new era, but it didn’t feel very “Railsy”. It was often a pain point for engineers who frequently resorted to just avoiding the configuration nightmare and using Rails as an API and some other framework isolated for the front-end.
It wasn’t until the introduction of Stimulus that they found something that fit with the rest of the Rails ecosystem. At the time, February 2018, we were told Stimulus.js and Turbo were two-thirds of a new web framework that would eventually be called Hotwire. The third piece, Strada, was focused on leveraging Stimulus, Turbo & HTML to build modern mobile applications. However, it took Strada five and a half years to arrive in September 2023. The mobile libraries turbo-ios and turbo-android were replaced by hotwire-native-android and hotwire-native-ios the following year and are the official implementations of Hotwire Native.
Now that we’ve covered the back story, let’s get to the meat and potatoes of what I want to talk about. Hotwire Native + Rails is a great combination for teams that want to build apps once and have them serve web and mobile. Even though the Hotwire trio of Turbo, Stimulus & Native can work independently of Rails, I think it fits perfectly if you want to go from zero to MVP quickly or if you’re working with a smaller team. The hotwired.dev site does a great job with the basic setup docs; however, there’s not a lot of guidance around some more advanced implementations, especially for engineers who have never written mobile applications before. The goal of this series is to answer some of those more advanced questions, like Native Authentication.
During the course of this blog post, we’ll:
- Build a Companion Android Application
- Build a Companion iOS Application
In future posts, we will:
- Implement Native Controls with Hotwire Bridge Components
- Implement Native Login & Map Screen
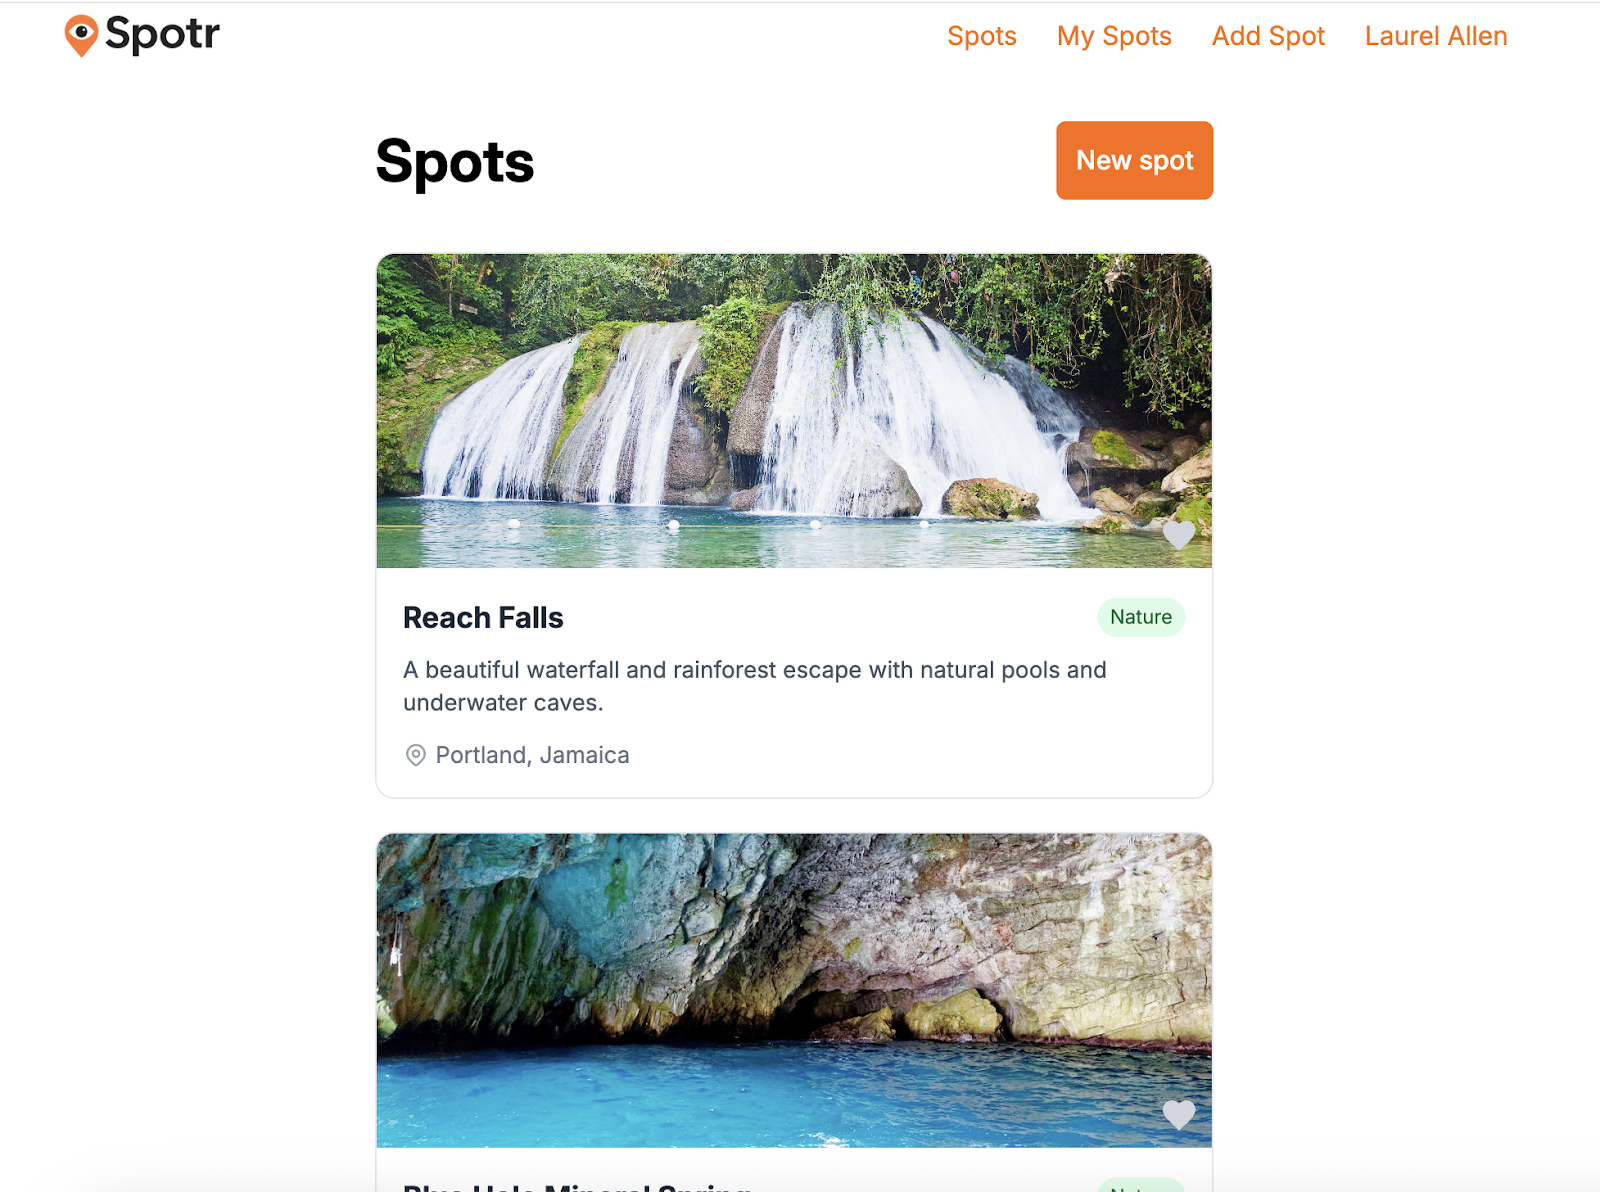
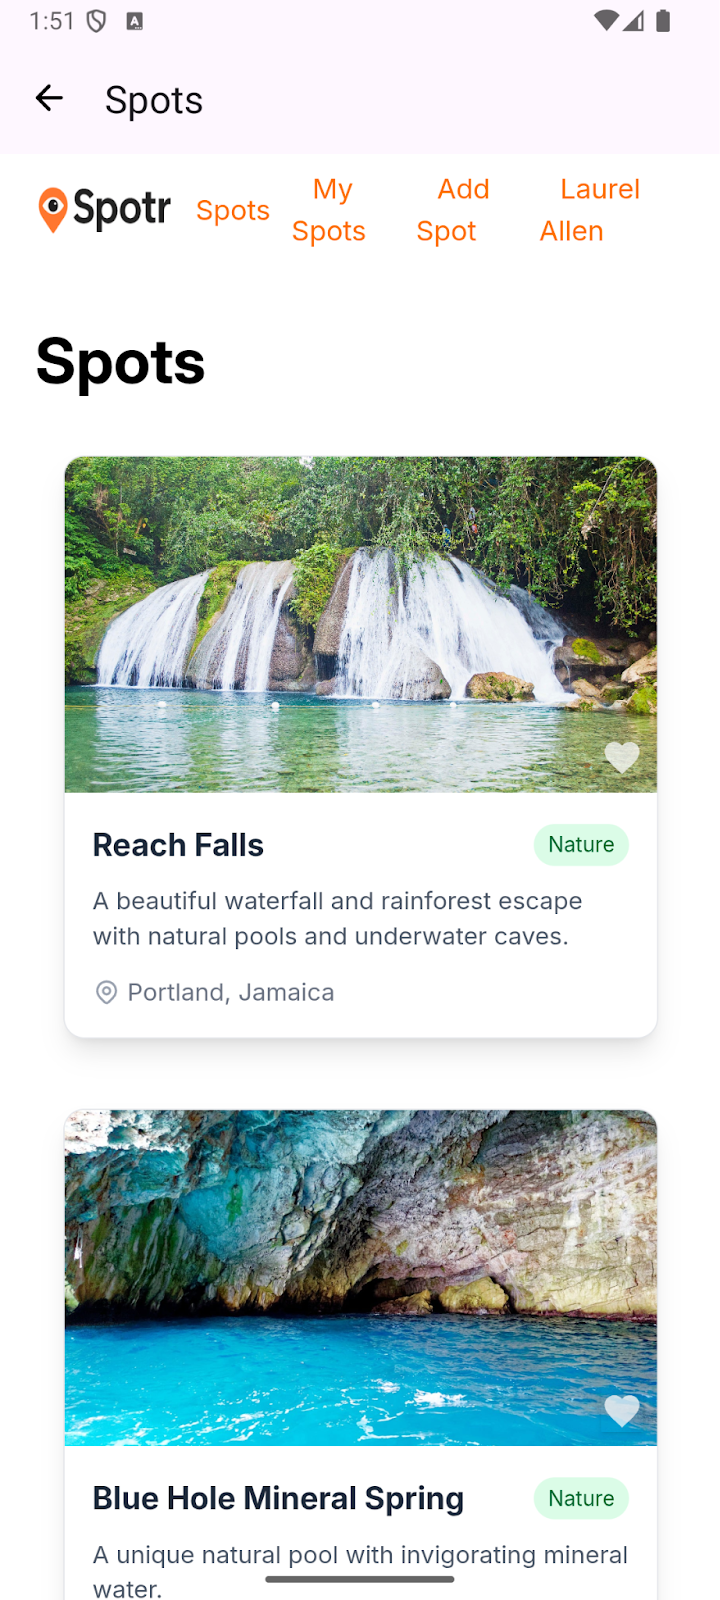
Our demo application allows users to create and share local spots they find interesting. Users can log in, add spots, like spots, and locate spots on a map. We’ve already created our Rails 8 application built using the authentication generator to manage our web authentication process. While you don’t need to know the following technologies and products, you should familiarize yourself with them beforehand.
- Android Studio - Official IDE used for Android development
- Xcode - Official IDE for developing, testing, and distributing iOS, MacOS & watchOS applications
- Kotlin - Programming language used to develop Android applications
- Swift - Programming language used to develop iOS, macOS & watchOS applications
Without further ado, let’s get started.
Go Forth with Android
Setup & Installation
- Download & install Android Studio
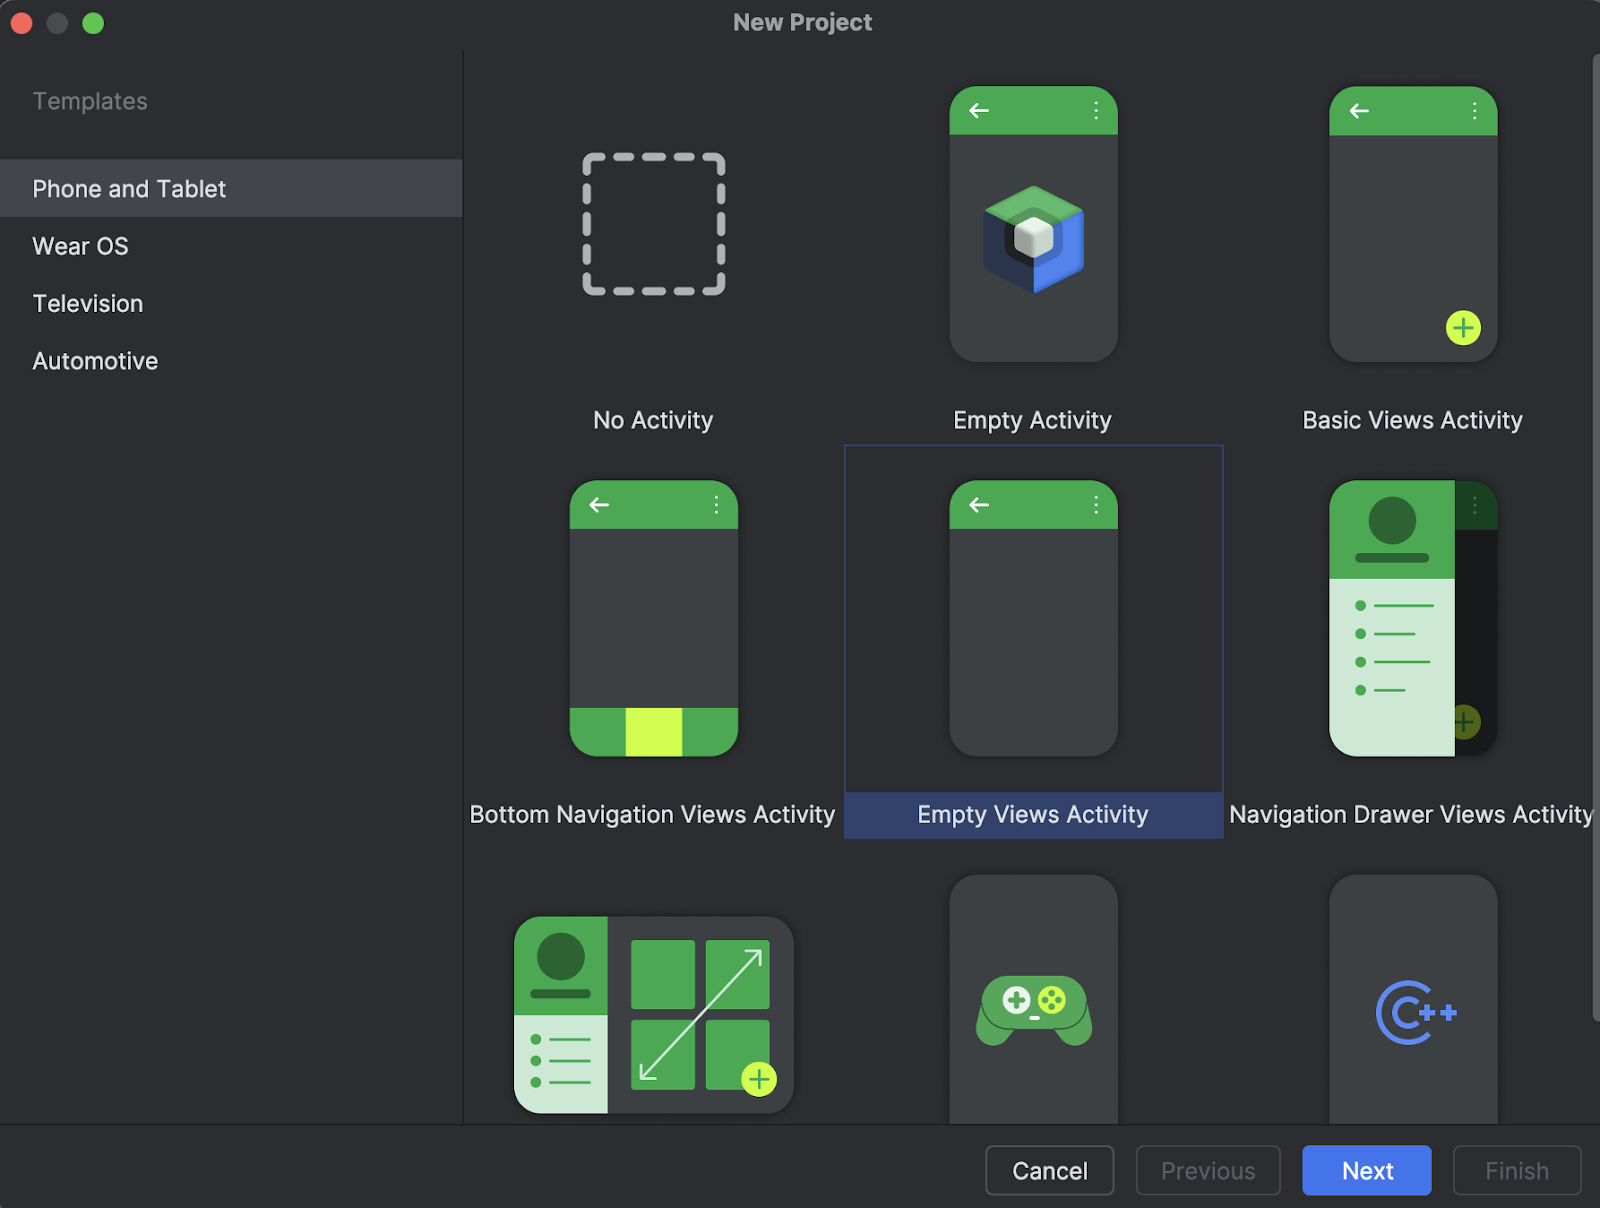
- Open Android Studio and create a new Android Project
- Choose the “Empty Views Activity” template.
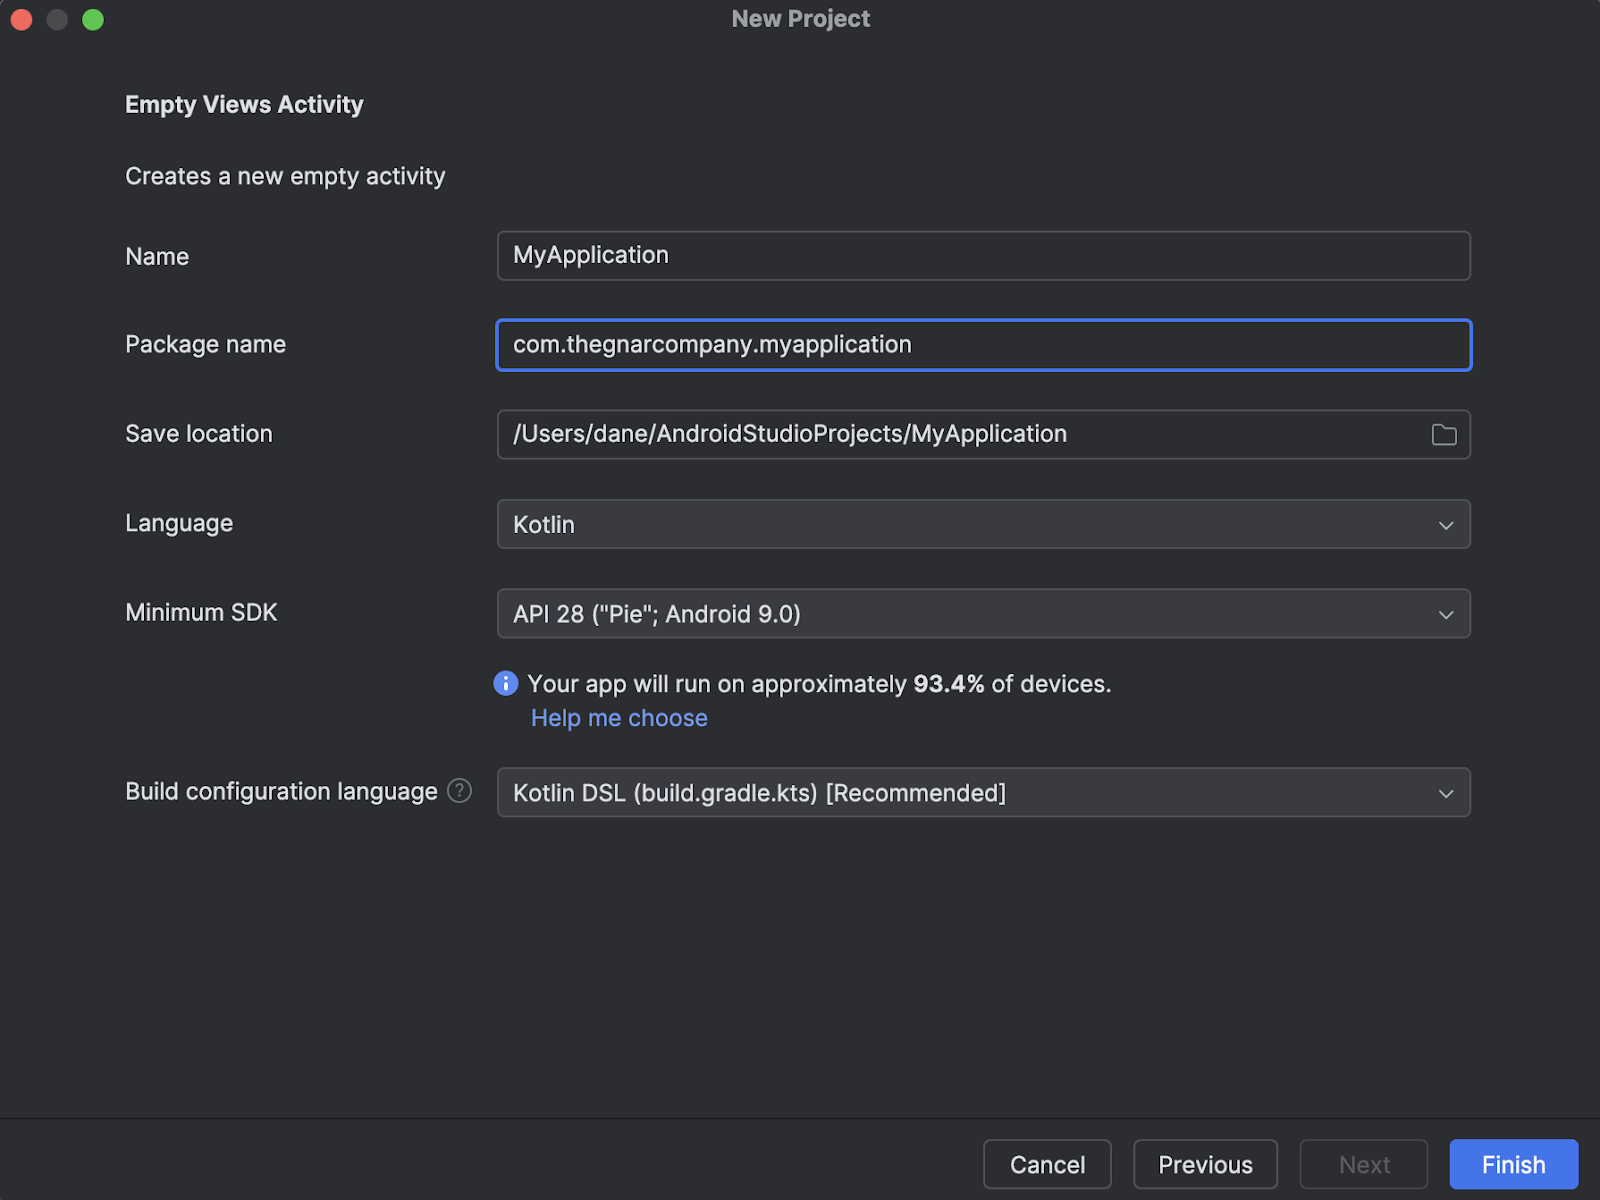
- Hotwire Native requires API 28 or higher for the minimum SDK and Kotlin DSL for the build configuration language.
- Then, we need to add the Hotwire Native libraries to the module
build.gradle.ktsfile. You can think of this file like an Android version of theGemfile. It handles external packages and build configuration.

- Next sync, your Gradle file. Then, we update our
MainActivity. In Ruby on Rails terms, you can think of an activity as a page or controller. TheMainActivityis the root or entry point of our application.
import UIKit
import HotwireNative
@main
class AppDelegate: UIResponder, UIApplicationDelegate {
    func application(_ application: UIApplication, didFinishLaunchingWithOptions launchOptions: [UIApplication.LaunchOptionsKey: Any]?) -> Bool {
        // Override point for customization after application launch.
        let localPathConfigURL = Bundle.main.url(forResource: "path-configuration", withExtension: "json")!
        let remotePathConfigURL = URL(string: "http://example.com/configurations/ios_v1.json")!
        Hotwire.loadPathConfiguration(from: [
            .file(localPathConfigURL),
            .server(remotePathConfigURL)
        ])

        return true
    }
}
- Navigate to
app/res/layouts/activity_main.xmland update as follows. If the MainActivity is the page or controller, then our XML layout file would be the view file with all the UI elements and components.
<?xml version="1.0" encoding="utf-8" ?>
<androidx.fragment.app.FragmentContainerView
   xmlns:android="http://schemas.android.com/apk/res/android"
   xmlns:app="http://schemas.android.com/apk/res-auto"
   android:id="@+id/main_nav_host"
   android:name="dev.hotwire.navigation.navigator.NavigatorHost"
   android:layout_width="match_parent"
   android:layout_height="match_parent"
   app:defaultNavHost="false" />
- Update the
AndroidManifest.xmlfile. This file, in Rails terms, would be a combination of the files that reside in theconfigdirectory.
<?xml version="1.0" encoding="utf-8"?>
<manifest xmlns:android="http://schemas.android.com/apk/res/android">
   <uses-permission android:name="android.permission.INTERNET"/>
   <!--  Remove the usesCleartextTraffic attribute for production apps  -->
   <application
       android:allowBackup="true"
       android:dataExtractionRules="@xml/data_extraction_rules"
       android:fullBackupContent="@xml/backup_rules"
       android:icon="@mipmap/ic_launcher"
       android:label="@string/app_name"
       android:roundIcon="@mipmap/ic_launcher_round"
       android:supportsRtl="true"
       android:usesCleartextTraffic="true"
       android:theme="@style/Theme.Spotr">
       <activity
           android:name=".MainActivity"
           android:exported="true">
           <intent-filter>
               <action android:name="android.intent.action.MAIN" />

               <category android:name="android.intent.category.LAUNCHER" />
           </intent-filter>
       </activity>
   </application>
</manifest>
- Once completed, we can now run our app by clicking the play button on the main Android Studio navigation bar.
Hide HTML Artifacts
Awesome, we have something installed and running on an Android device. We could just stop here and publish this to the Google Play Store. However, it’s quite obviously just a website wrapped inside an app. Let’s change that.
Since we’re running a Rails app, we can get rid of that navbar by using the hotwire_native_app? helper that ships with the turbo-rails gem.
 <% unless hotwire_native_app? %>
   <nav class="flex justify-between items-center w-full max-w-4xl mx-auto py-2 mb-8">
  ..
   </nav>
 <% end %>
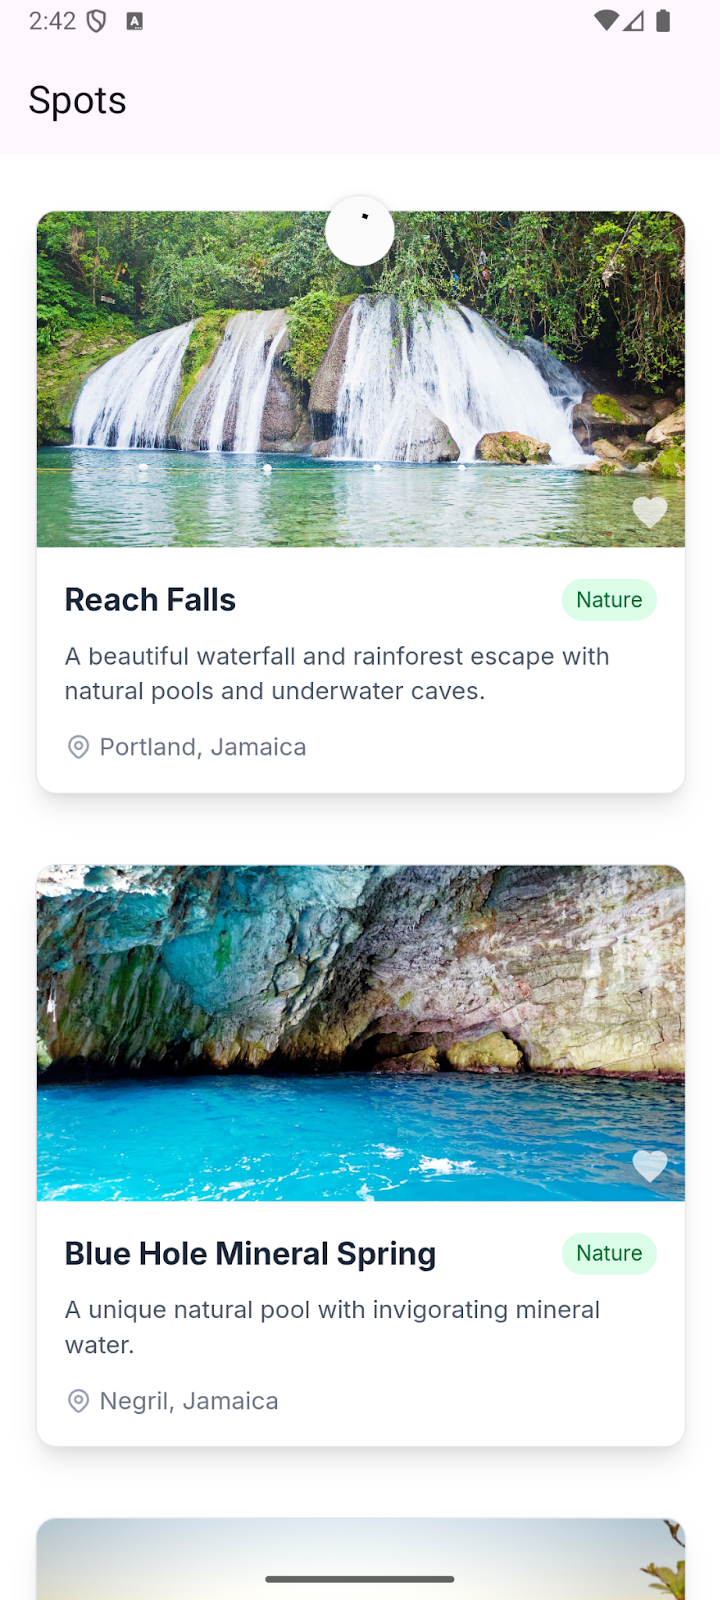
Hotwire Native automatically detects the page title and sets it as the title in the Android navigation bar, so we can also remove the h1 title on the page. The result is much closer to an actual native mobile application, and if I were to show this to you on a device, it would be impossible for you to detect that it wasn’t purely native code. Similarly, because we’re using HTML & CSS, we can use CSS classes to hide other areas of your site.

That being said, there are still things we can do to further improve the functionality. For example, users have become accustomed to using the “Pull to Refresh” feature, something our application currently lacks, so let's fix that.
Path Configuration
Hotwire Native uses a path-configuration.json file to manage everything from settings to custom behavior for our individual pages. It is recommended that you ship your app with a copy of this file, usually at app/src/main/assets/json/path-configuration.json. However, you can also have a remote version served from your server, allowing you to make changes to your application without needing to publish a new version to the app store. It is the path configuration file that we will use to enable “Pull to Refresh”. Add the following to your path configuration file.
{
 "settings": {},
 "rules": [
   {
     "patterns": [
       ".*"
     ],
     "properties": {
       "context": "default",
       "uri": "hotwire://fragment/web",
       "pull_to_refresh_enabled": true
     }
   }
 ]
}
This is the base from which all path configuration files should start. There’s a settings object that can be used to define unique settings for your application. The rules array is used to define how routes in your application should perform on mobile. The first rule in the above snippet tells our native application to use the default context for all routes, match it to the hotwire://fragment/web. The uri maps one-to-one with Android fragments in our application; the two listed are provided by the Hotwire Native library. There’s also a context key, which tells the application how to settle these routes, usually modal or default. Then we have the setting to enable “Pull to Refresh”.
We’ve added our path-configuration file, but we need to configure our application to use it. The recommended approach is to create an Application class and load our Hotwire Native configurations there. In our main project folder, create a new file for your Application class.
class SpotrApp: Application() {
   override fun onCreate() {
       super.onCreate()
       configureApp()
   }

   private fun configureApp() {
       // Loads the path configuration
       Hotwire.loadPathConfiguration(
           context = this,
           location = PathConfiguration.Location(
               assetFilePath = "json/path-configuration.json",
           )
       )

       // Set configuration options
       Hotwire.config.debugLoggingEnabled = BuildConfig.DEBUG
       Hotwire.config.webViewDebuggingEnabled = BuildConfig.DEBUG
       Hotwire.config.jsonConverter = KotlinXJsonConverter()
       Hotwire.config.applicationUserAgentPrefix = "Spotr; Hotwire App;"
   }
}
Next, we want to update our AndroidManifest file to use our new Application class. Add the following to the application tag; remember to use the name you set in your Application class.
android:name=".SpotrApp"
Once we rebuild and run, we should have the “Pull to Refresh” behavior enabled.
Now Conquer iOS
Setup & Installation
You will need a Mac to conquer this section, but once you get started, you’ll find the iOS setup much more straightforward than the Android setup.
- Download and install Xcode
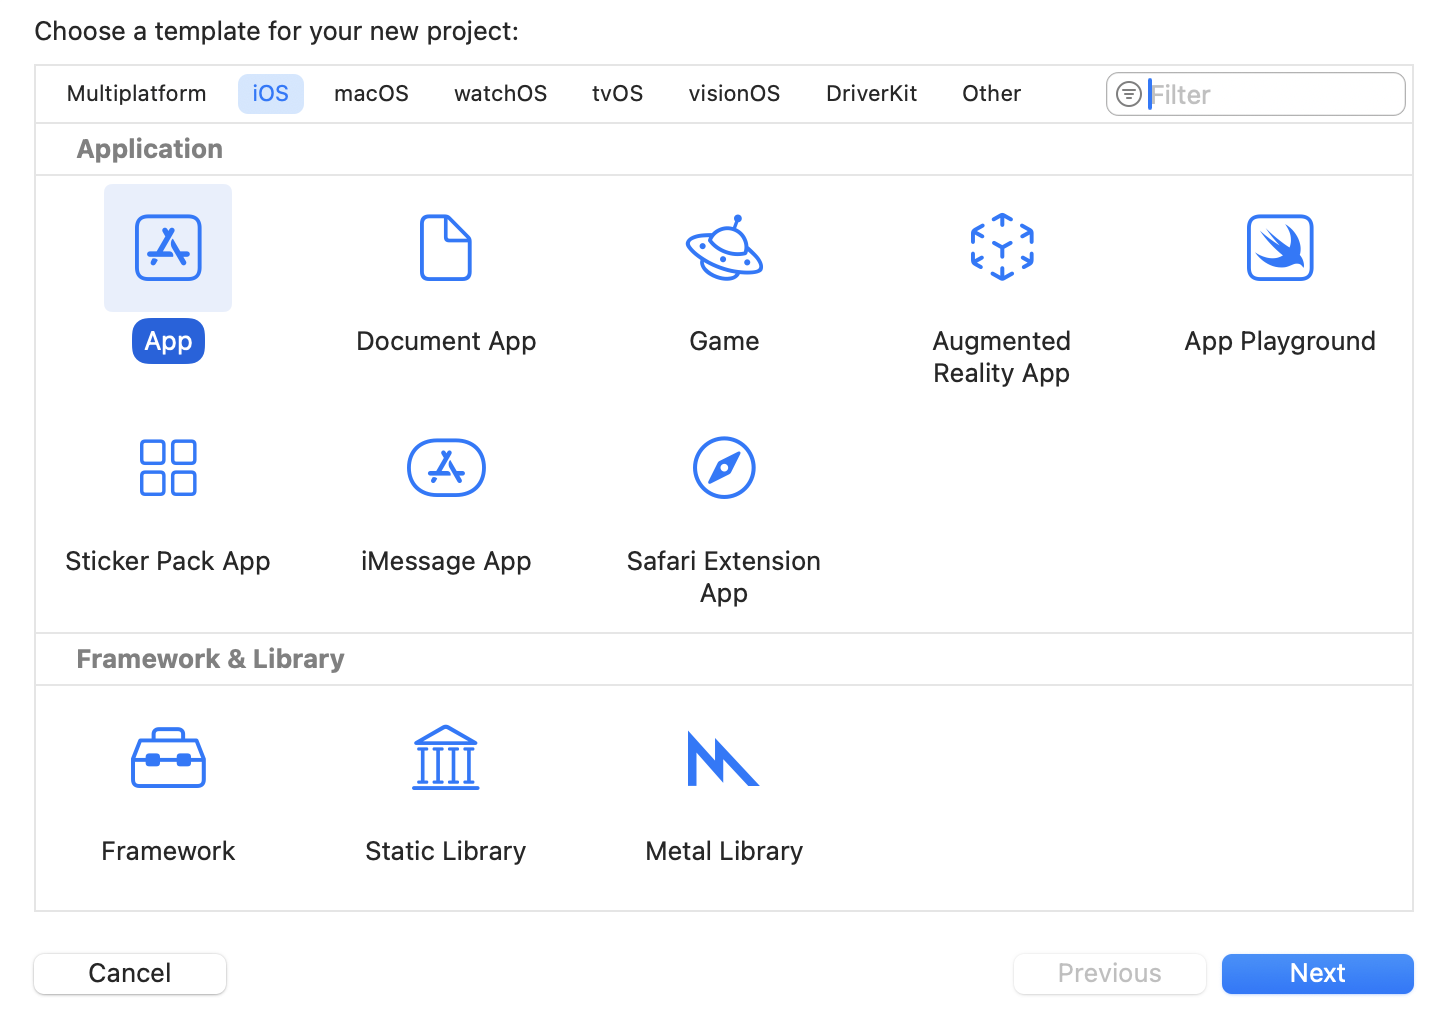
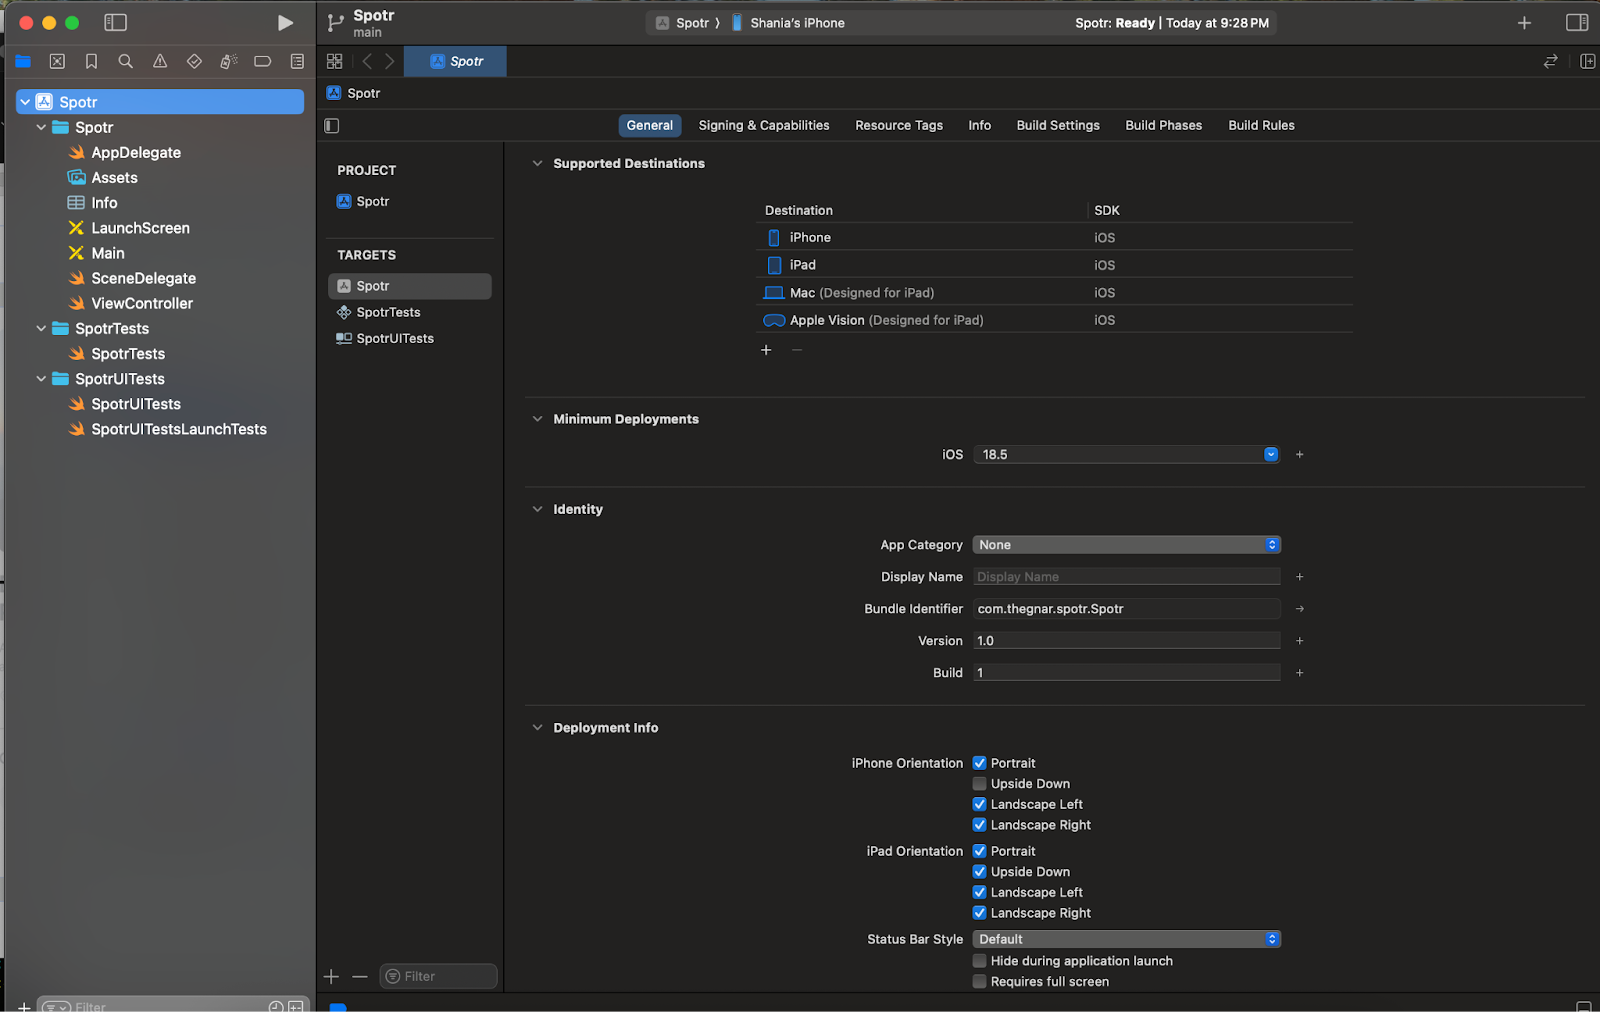
- Open Xcode
- Click “Create New Project…”
- Select “App” then press “Next”
- Enter the “Product Name” and fill in the other information. Be sure to select “Storyboard” as the “Interface”. Then press “Next”
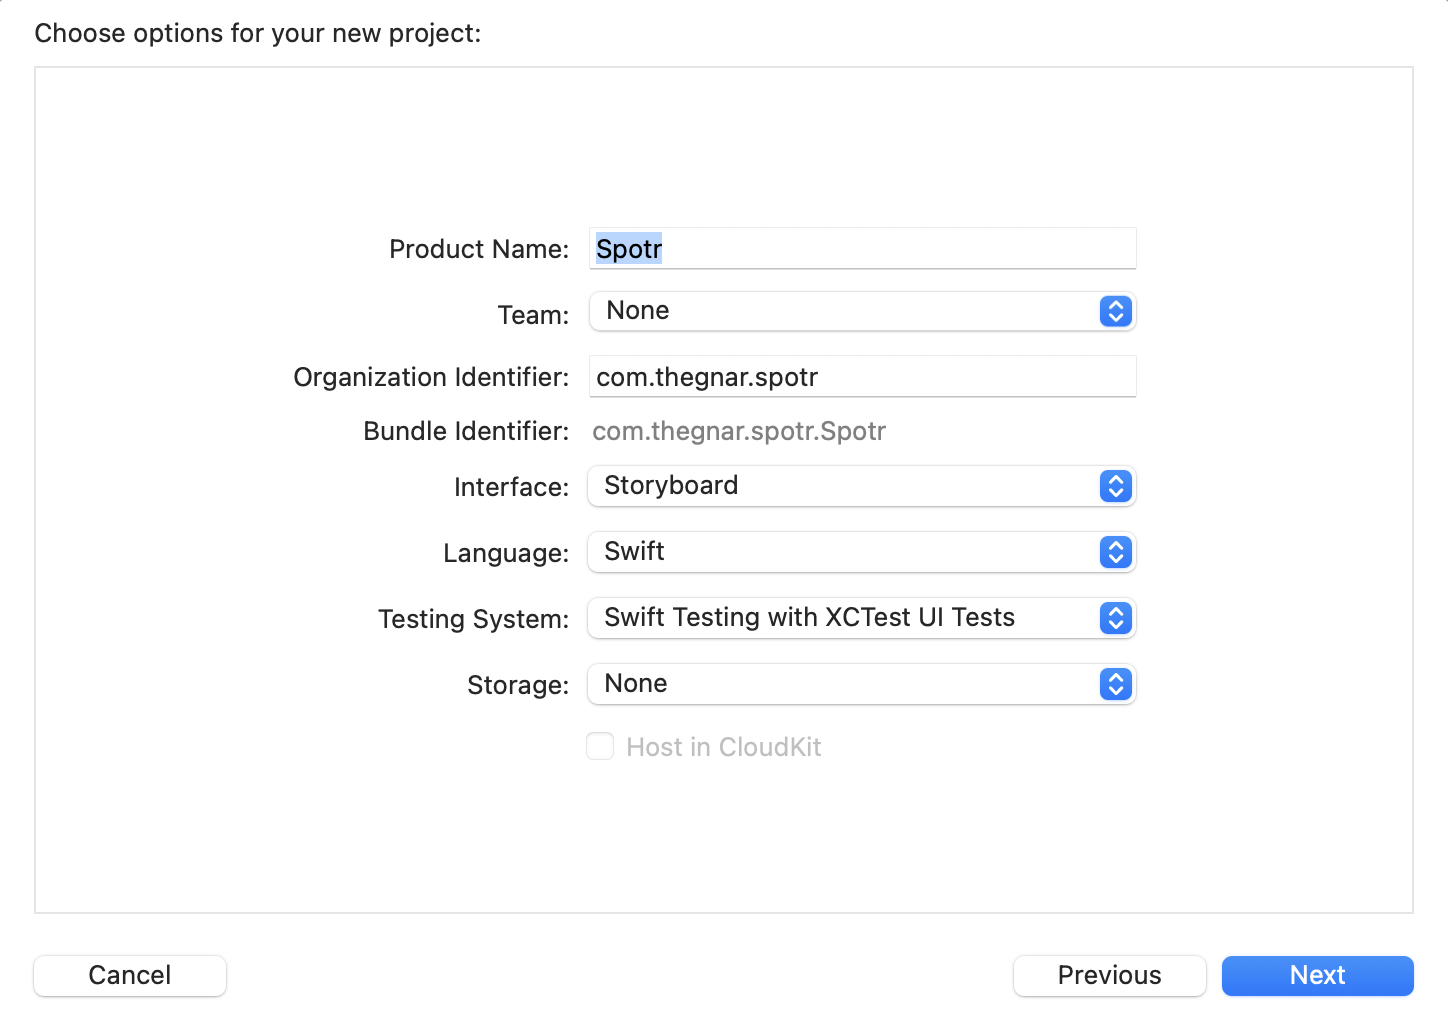
- Select where you want to save your project, then click “Create”. After which you will be taken to your App.
- Next, we need to add Hotwire Native. Go to File → Add Package Dependencies… and add https://github.com/hotwired/hotwire-native-ios in the search field. The click “Add Package”
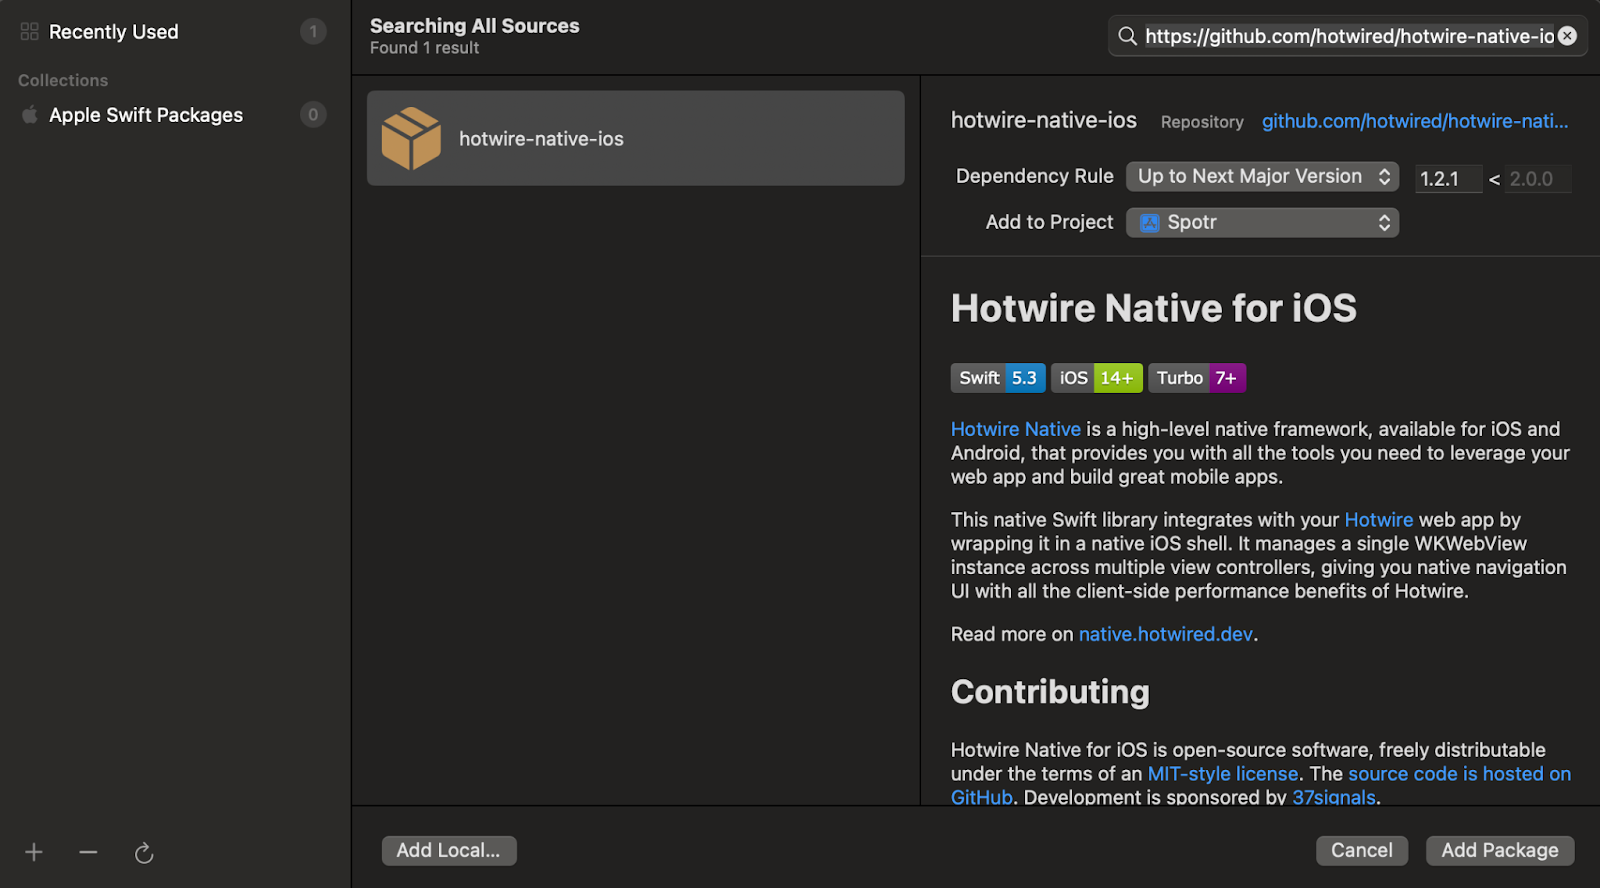
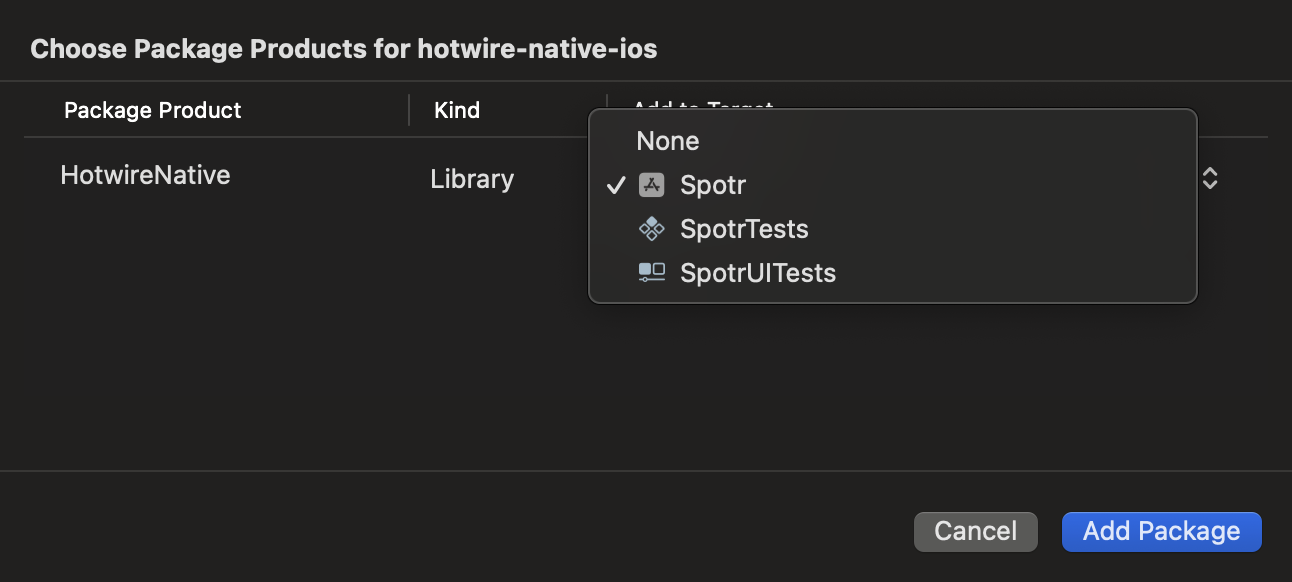
- Once the package is downloaded, we need to “Add to Target”, which basically means add it to our Project.
- Finally, we need to modify the
SceneDelegatefile. You can think of this file like your root path orHomeControllerin your Rails project. Replace its contents with the following, then hit run (it’s the big play button in the main navbar).
import HotwireNative
import UIKit

let rootURL = URL(string: "http://localhost:3000")!

class SceneDelegate: UIResponder, UIWindowSceneDelegate {
    var window: UIWindow?

    private let navigator = Navigator(configuration: .init(
        name: "main",
        startLocation: rootURL
    ))

    func scene(_ scene: UIScene, willConnectTo session: UISceneSession, options connectionOptions: UIScene.ConnectionOptions) {
        window?.rootViewController = navigator.rootViewController
        navigator.start()
    }
}
- Go ahead and update your LinkedIn profile to say “iOS Developer” because you have a running iOS application.
Path Config Me Please
Like its Android counterpart, for best results, we need to add a local path-configuration.json file to our project. Just create a file in the root directory and add the following for now.
{
  "settings": {},
  "rules": [
    {
      "patterns": [
        ".*"
      ],
      "properties": {
        "context": "default",
        "pull_to_refresh_enabled": true
      }
    }
  ]
}
Next, we need to tell our Hotwire Native application where to find the path configuration file and which version to use. We do this in our AppDelegate file. This is akin to our application.rb in our Rails project. This is where you want to place actions that should happen when the app first launches. Hence, it’s perfect for our Hotwire Native configurations. But first, let's create an object to hold our root URL, like we did on Android.
import Foundation

struct Spotr {
    static let remote = URL(string: "https://your-web-server.com")!
    static let local = URL(string: "http://localhost:3000")!

    /// Update this to choose which demo is run
    static var current: URL {
        local
    }
}
Now we can update the AppDelegate file using our reusable root URL path. The path configuration should look familiar from the Android setup. It takes both a local and a remote path.
import UIKit
import HotwireNative
@main
class AppDelegate: UIResponder, UIApplicationDelegate {
    func application(_ application: UIApplication, didFinishLaunchingWithOptions launchOptions: [UIApplication.LaunchOptionsKey: Any]?) -> Bool {
        // Override point for customization after application launch.
        let localPathConfigURL = Bundle.main.url(forResource: "path-configuration", withExtension: "json")!
        let remotePathConfigURL = URL(string: "http://example.com/configurations/ios_v1.json")!
        Hotwire.loadPathConfiguration(from: [
            .file(localPathConfigURL),
            .server(remotePathConfigURL)
        ])

        return true
    }
}
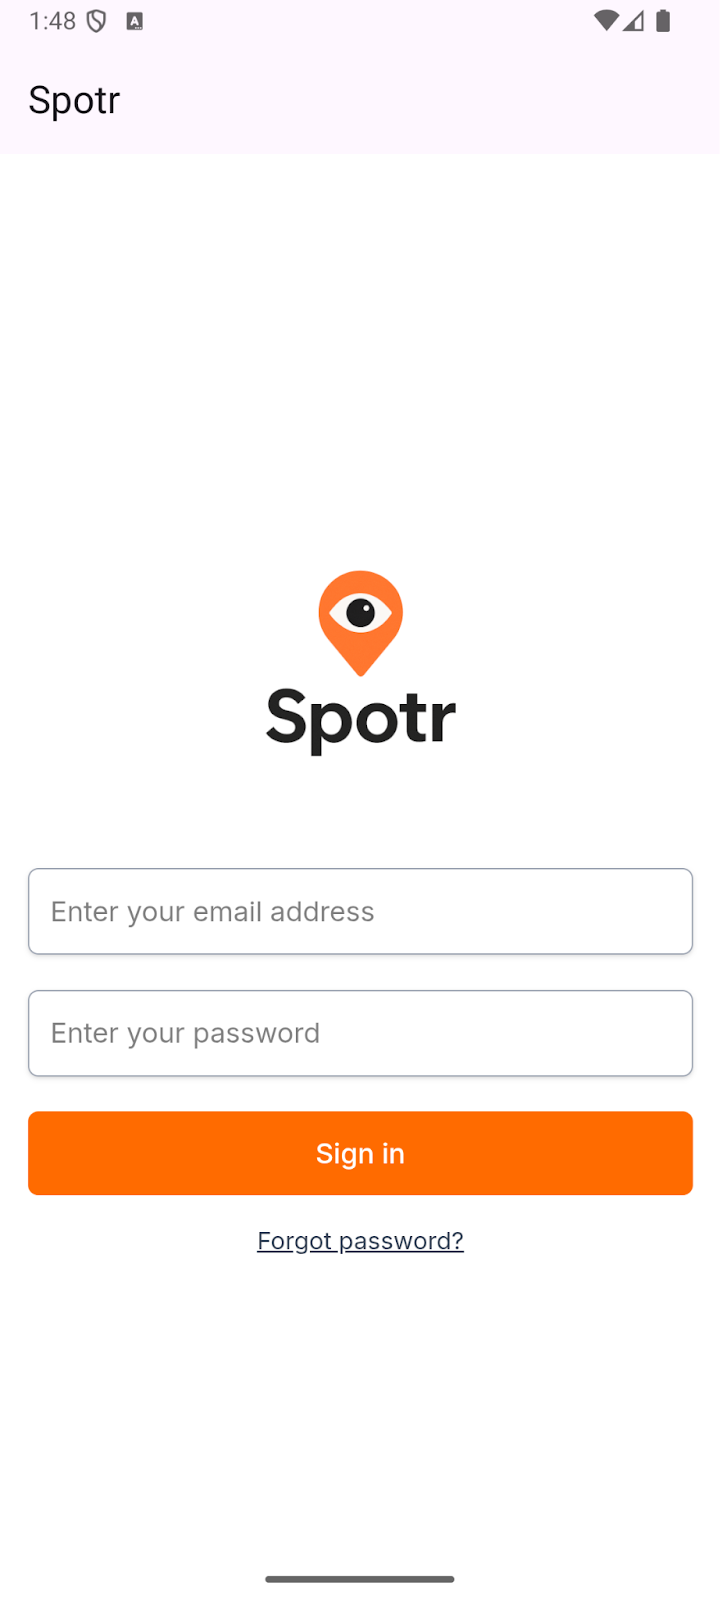
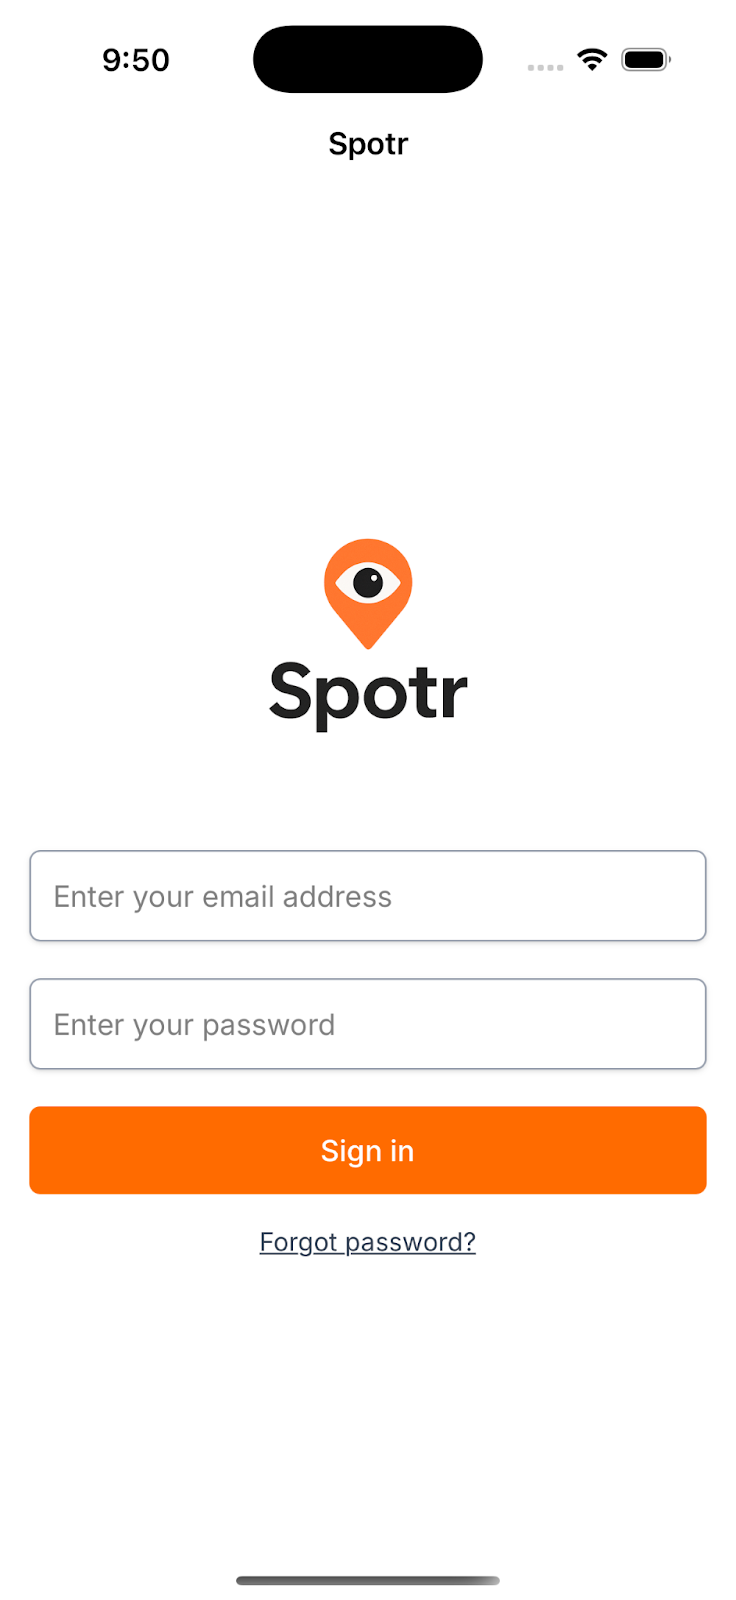
Now, when we log in and get to the main page for our app. We should have the “Pull to Refresh” feature enabled.
That’s it, we have two mobile applications built and ready for distribution on the Google Play Store and Apple App Store. Throughout the rest of the series, we’ll dive into how to add some native components with Hotwire's Bridge Components to make our application feel more natural on our mobile devices. We’ll also be tackling building a native authentication flow for our application, as well as adding a custom map view. Until next time, Happy Coding!

Dane Wilson is a Senior Software Engineer at The Gnar Company, where he builds scalable, production-ready applications for a wide variety of clients. Since joining The Gnar, he's developed AED equipment management systems for a major emergency response company and built reverse logistics infrastructure for Onepak's e-waste recycling platform.
With over a decade of full-stack experience, Dane has a track record of modernizing legacy codebases and establishing engineering best practices at companies including Teladoc, Primary.Health, and Kinship. He's passionate about clean architecture, mentoring junior developers, and writing code that future engineers will actually thank you for.
When he's not refactoring legacy code or conducting code reviews, you'll find him watching Manchester United and being a proud girl dad.